
Learn · Designers and builders · Lesson 4 of 15
Use your own tiles and finishes from a photo
You willPhotograph a tile, board or sample, give it its real size and laying, and put it on a floor, a wall band or a benchtop.
Time6 min
Why it mattersThe tile or board actually chosen, at its real size, shows in 3D, on the plan, the elevations and the schedules.
Try it in Plotlay → Opens an example project with this lesson beside it. Nothing to install.
Steps
- Open the command menu (Ctrl or Cmd + K) and choose New finish from a photo. With a room selected, My finishes… under Finishes and fit-out opens the same thing.
- Choose Take a photo on a phone, or Choose a picture. Lay the sample flat in even light, with all four corners in the photo.
- Drag the four handles onto the corners of the tile, board or sample. Squared up shows it straightened, even if the photo was taken at an angle. Then Next.
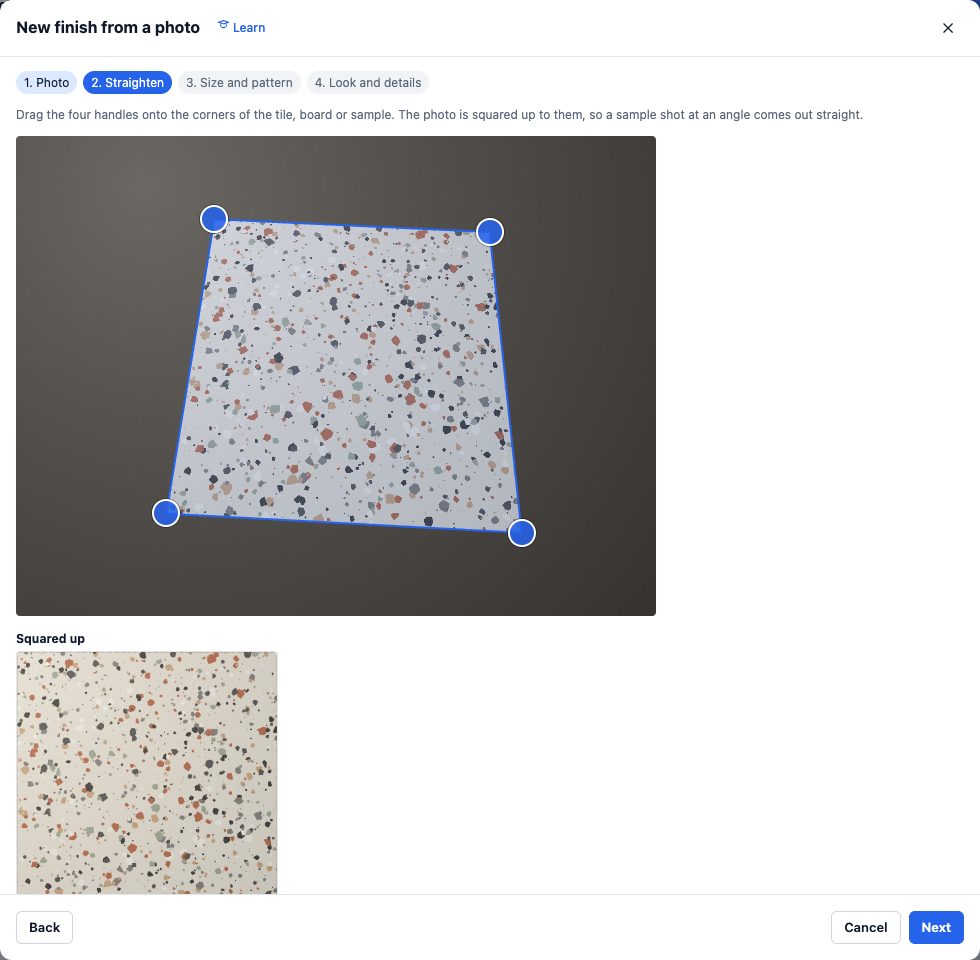
- Choose Tiles, Boards or Sheet or slab and type its real size in millimetres, the grout and how it is Laid. For stone, render or fabric, Measure with a scale bar… sets the size from a ruler in the photo. Check the three by three preview for seams.
- Set the Surface (matt to gloss), the plan colour, where it can go and the product details, then Save finish.
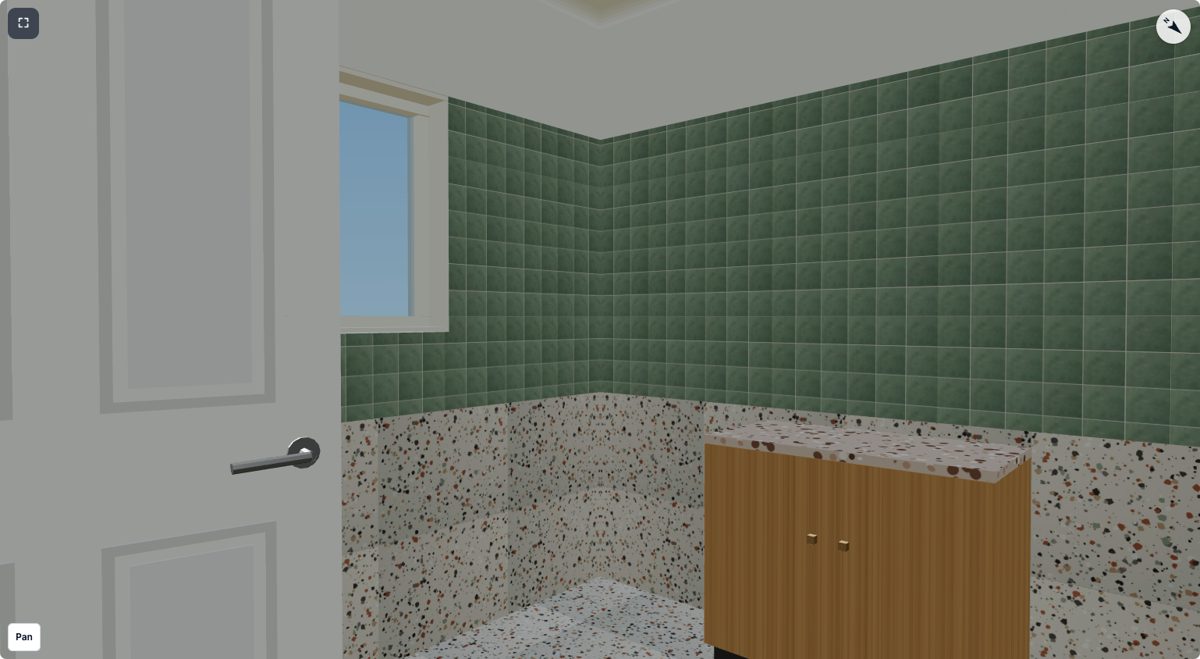
- In My finishes, click the finish and choose Apply…: the floor, full height walls, or a band such as 900 to 2100, from the corner or centred.
Tips
- Your finishes are at the top of Choose a tile and the floor, wall and benchtop pickers, so you can use them where you already choose finishes.
- Save to my library keeps a finish for every project; with a team, choose the team library to share it.
- To compare two tiles on the same wall, apply each to its own Design option.
- Brand, code, supplier and price show in the Finish schedule and Schedules, and the estimate can use the price.
Common mistakes
- A tile comes out the wrong size: the size is the face of one tile, without the grout. A 600 × 300 tile with 2 mm grout repeats every 602 × 302.
- A line shows where a stone or render photo repeats: choose Offset and blend the edges under Repeat and raise the blend.
- The finish looks soft up close: the photo was small or out of focus. The dialog warns about both; take it closer, in good light.
Words in this lesson
- Fit-out
- The fixed things that go into a room: vanities, toilets, kitchen runs, appliances, lights and joinery. Fit-out is placed against a wall and built in 3D.
- Library
- Real-sized things to place, by category and subcategory: kitchen, bathroom, furniture, lighting, power, heating, stairs, outdoor, site, commercial, vehicles, plants. Search in your own words (GPO, countertop), filter, and star favourites.
- Design option
- One of two or more versions of part of a design, such as two vanities, kept in one project. Only the chosen option shows; clients can pick the one they like.
- Schedule
- A table drawn from the plan: rooms and finishes, doors, windows, plants or materials. It updates as the plan changes and downloads as CSV.
Related lessons
Choose finishes and add fit-out to a roomSet a room’s floor tile and paint, and place a fitting such as a towel rail against a wall to the millimetre.5 minCompare design optionsKeep two versions of a room in one project and show one at a time.4 minRead and download the schedulesGet the room, finish, door and window schedules on screen, fill in finishes, and download them as CSV.3 minMake elevations and sectionsGet scaled outside elevations, sections and inside wall views from the plan, and download them as a PDF.4 min
Steps checked in the app on 18 October 2026.