
Learn · Designers and builders · Lesson 4 of 9
Make elevations and sections
You willGet scaled outside elevations, sections and inside wall views from the plan, and download them as a PDF.
Time4 min
Try it in Plotlay → Opens an example project with this lesson beside it. Nothing to install.
Steps
- In the Building workspace choose Elevations. The four outside elevations are drawn from your rooms, doors, windows and roof.
- Under Roof set the Type (gable, hip, skillion or flat), the Pitch and the Eaves overhang. Set wall and opening heights under Walls and Doors & windows. The preview redraws as you go.
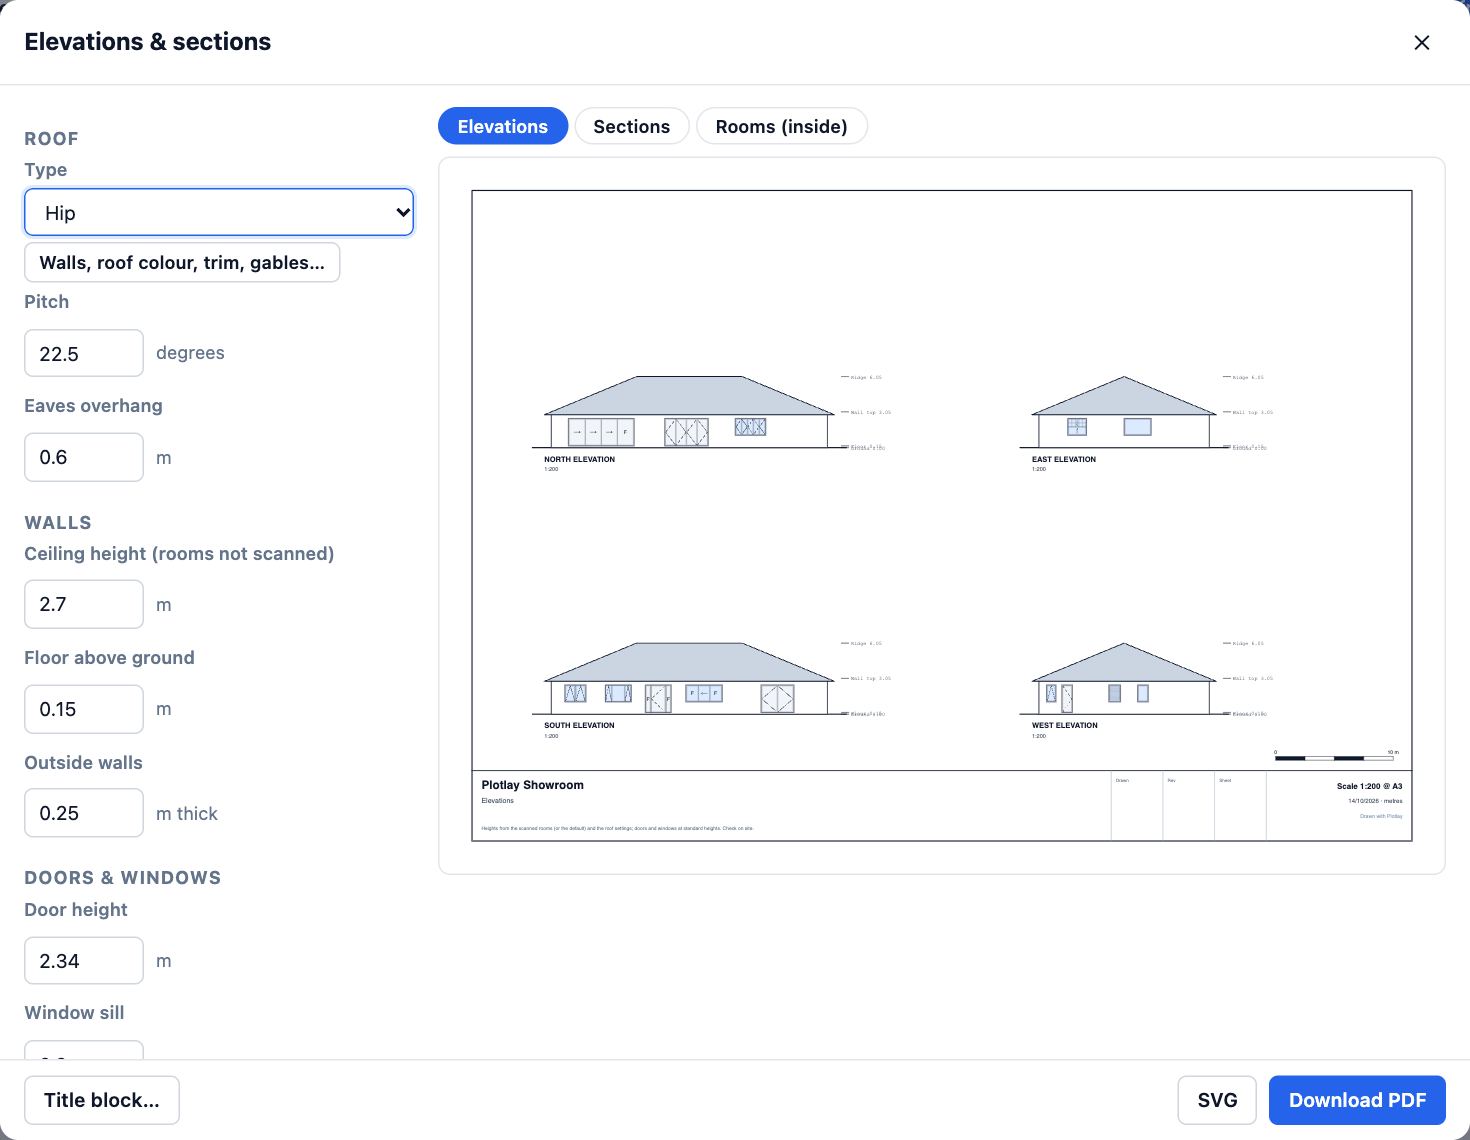
- For a section, choose + Add a section line, click where it starts on one side of the building, then where it ends on the other. The dialog comes back on Sections.
- Choose Rooms (inside) and pick a room: each wall straight on from inside, with what stands against it.
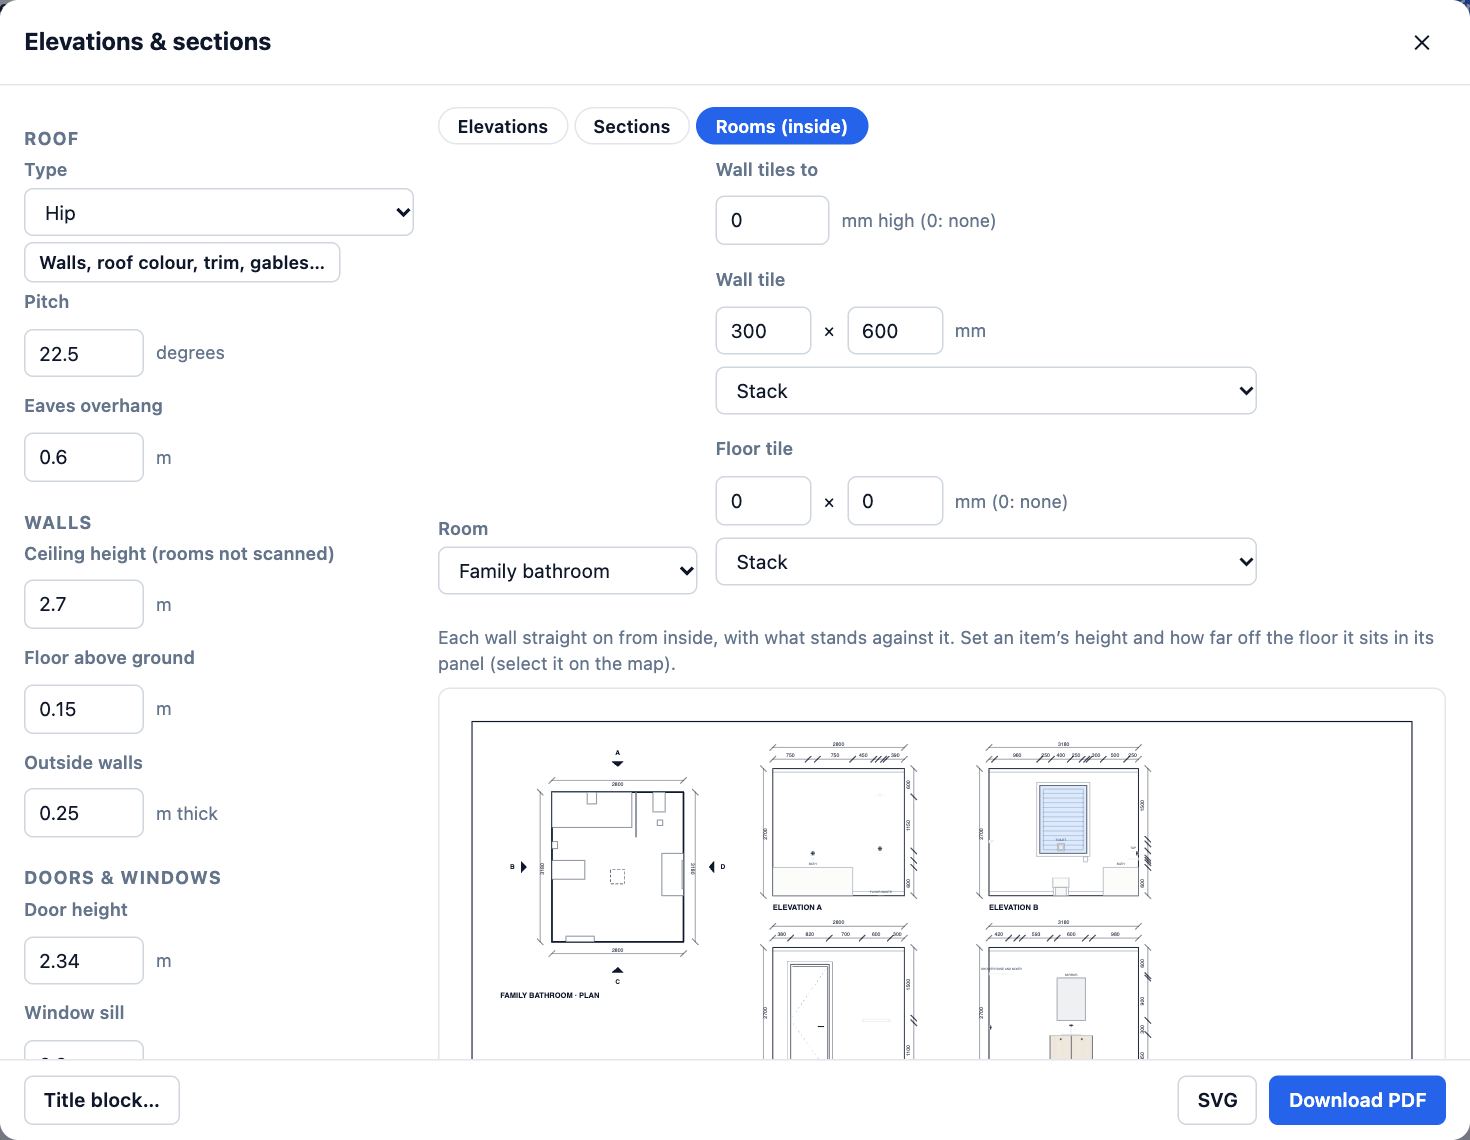
- Choose Title block… to fill in the sheet’s details, then Download PDF (or SVG) for the tab you are on.
Tips
- Ceiling heights from Plotlay Scan are used room by room; Ceiling height (rooms not scanned) covers the rest.
- Section lines are kept in the project, so a drawing set can include an A301 Sections sheet.
Common mistakes
- Hidden layers: only rooms on visible layers (and the current level) are drawn. Turn the layer back on in the Layers tab.
- Windows at odd heights: set Window sill and Window head here, or select one window to change only that one.
Related lessons
Issue a drawing setMake one numbered PDF of plans, elevations, 3D views and schedules with your title block.4 minDraw walls, then add doors and windowsDraw walls of a set thickness to size, then put doors and windows in them and set their type.4 minChoose finishes and add fit-out to a roomSet a room’s floor tile and paint, and place a fitting such as a towel rail against a wall to the millimetre.5 min
Steps checked in the app on 14 October 2026.