
Learn · Designers and builders · Lesson 2 of 9
Draw walls, then add doors and windows
You willDraw walls of a set thickness to size, then put doors and windows in them and set their type.
Time4 min
Try it in Plotlay → Opens Plotlay with this lesson beside it. Nothing to install.
Steps
- In the Building workspace choose Walls. In the bar that opens, pick the thickness, such as 230 mm brick, and whether the line you draw is the centre or a face (Line is centre).
- Click the first corner, then type each wall: 5 Enter, 4<90 Enter, 5<180 Enter, 4<270 Enter. Press Enter again to finish. Each wall shows its length.
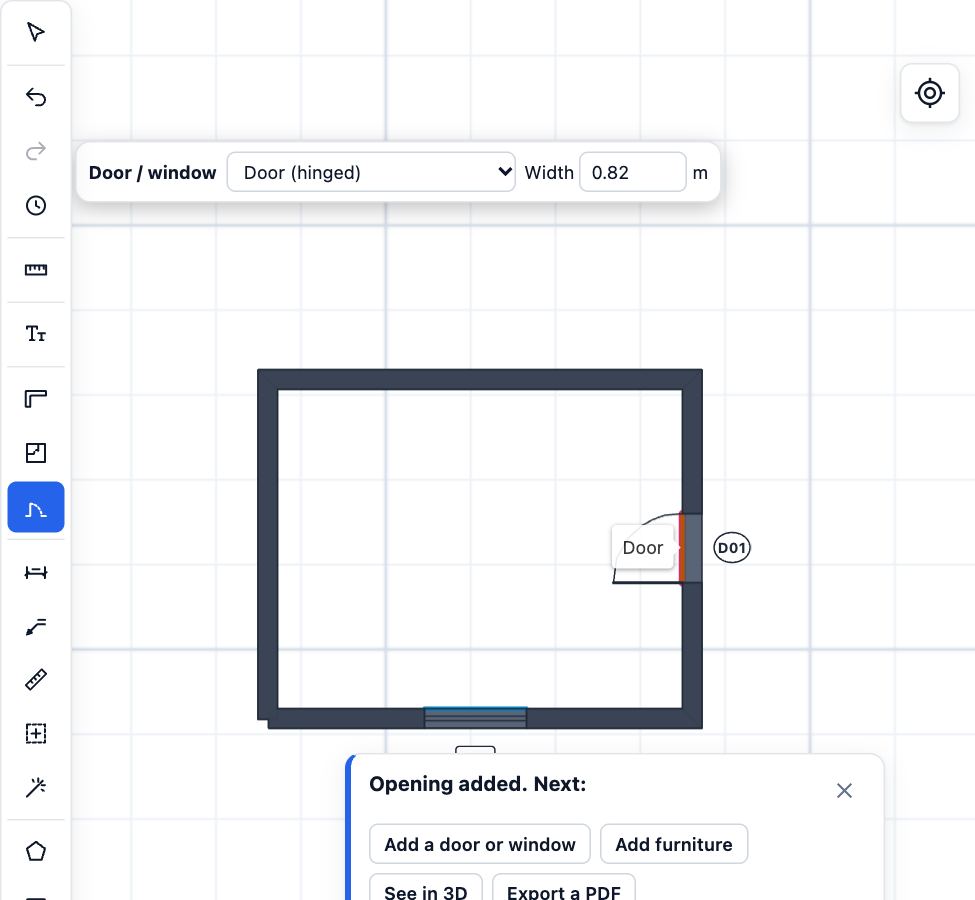
- Choose Door / window. In its bar pick the type, such as Window, and set the Width in metres.
- Move over a wall: a pink mark shows where the opening goes. Click to place it. Change the type to Door (hinged) and place a door the same way.
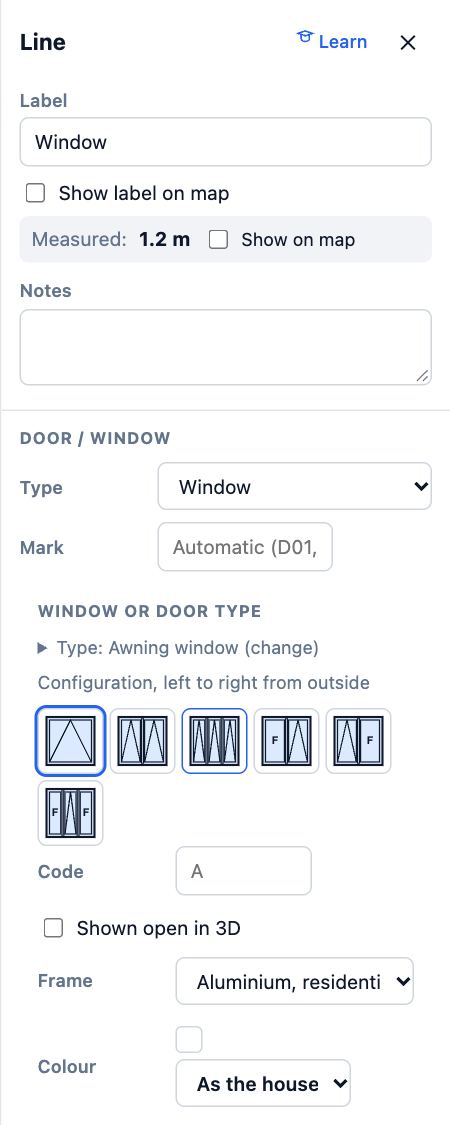
- Choose Select / pan and click the window. In the panel, set its Mark, height and sill, and under Window or door type pick a type such as Awning or Sliding.
Tips
- Doors and windows go on the Doors and windows layer and get marks (D01, W01) that the schedules and drawing sets use.
- A Room with Walls around it ticked draws the room and its walls in one go.
Common mistakes
- Clicking away from a wall with Door / window: it says to click on a wall or a room edge. Zoom in so the wall is easy to hit.
- Choosing a width wider than the wall: the opening is kept inside the wall, so draw the wall first, then the opening.
Related lessons
Draft to exact sizes with the command lineDraw lines to exact lengths and angles with typed values, snaps and ortho, the way you would in CAD.4 minDraw a room to sizeDraw a room by clicking its first corner and typing each wall length, then name it.3 minRead and download the schedulesGet the room, finish, door and window schedules on screen, fill in finishes, and download them as CSV.3 min
Steps checked in the app on 14 October 2026.