
Learn · Designers and builders · Lesson 17 of 17
Choose a sofa style and its fabric
You willPick a sofa, armchair or ottoman by style and layout, then its arms, legs, cushions and upholstery, or a fabric you photographed.
Time4 min
Why it mattersThe sofa is the biggest thing in a living room: the right style, size and fabric in 3D makes the room read true.
Try it in Plotlay → Opens an example project with this lesson beside it. Nothing to install.
Steps
- Open Library, search sofa (or Chesterfield, curved sofa, chaise, sofa bed) and click a sofa such as Sofa, 3 seat, Chesterfield. Click the plan to place it, then select it.
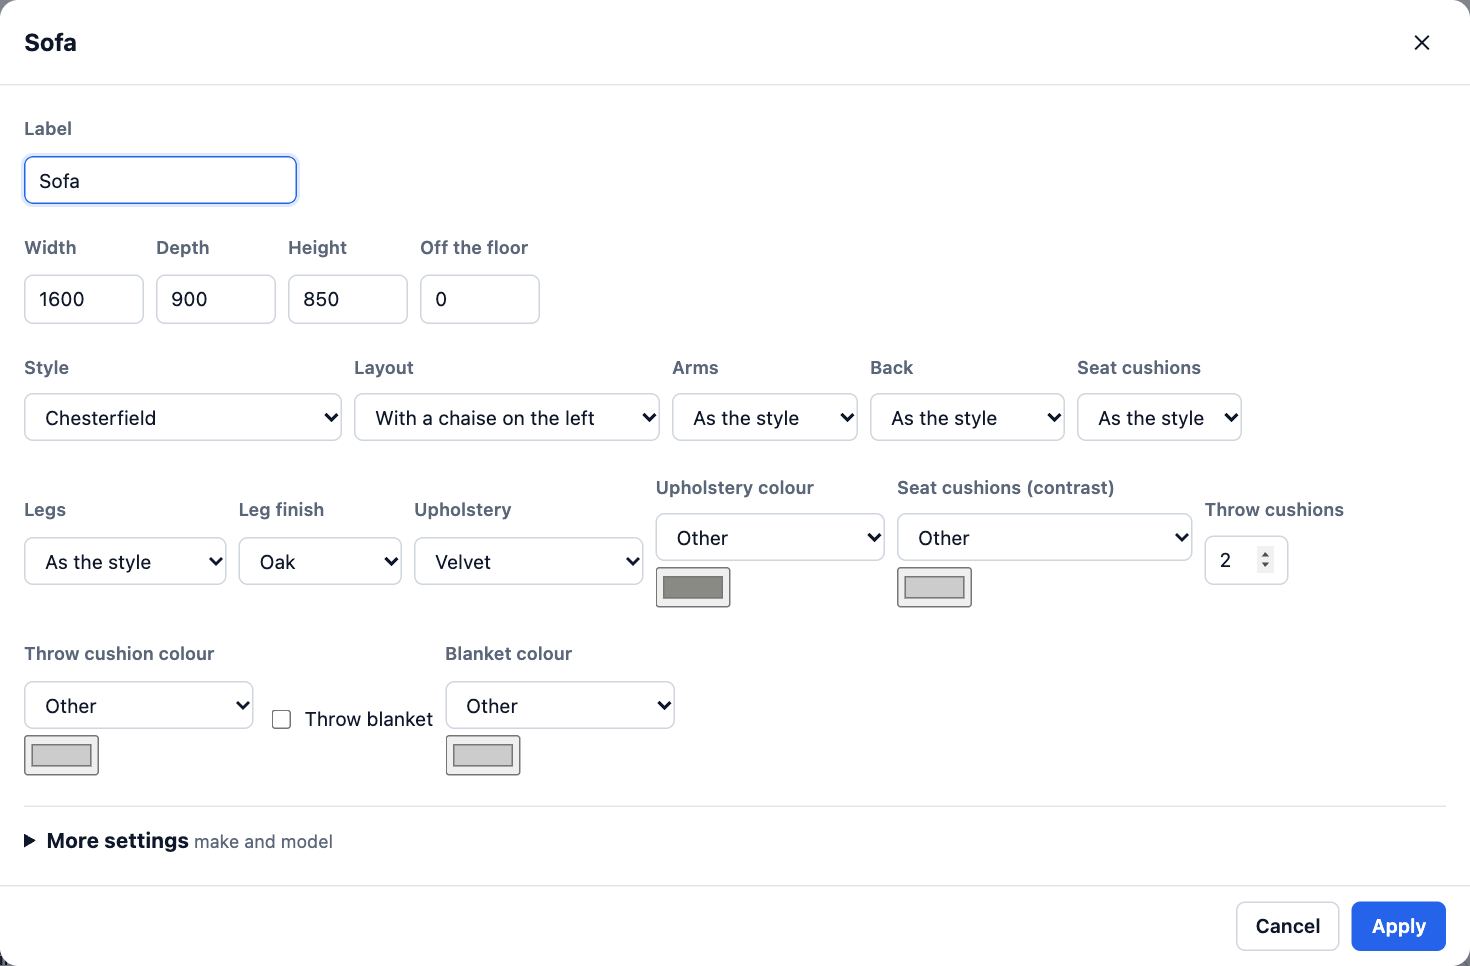
- Choose All details… under its name, then the Style: Contemporary, Chesterfield, Mid-century, Scandinavian, Curved, Deep-seat lounge, Lawson or Cloud. Each sets its own arms, back, legs and fabric.
- Choose the Layout: a loveseat, 2 to 4 seats, a chaise on either side, an L corner, a U-shape, a daybed or a sofa bed. The size changes to suit.
- Change any part from the style’s choice: Arms, Back, Seat cushions, Legs and Leg finish. As the style puts it back.
- Choose the Upholstery (linen, boucle, velvet, wool, chenille, performance fabric or leather) and the Upholstery colour. Add Throw cushions and a Throw blanket if you like, then Apply.
- For a fabric you have a sample of, photograph it with New finish from a photo (Sheet or slab) and tick Furniture fabric under where it can go. It is then in Upholstery as My finish and its name.
Tips
- The fabric’s weave shows at High and Ultra quality; Standard draws its colour only, so the view stays quick.
- Armchairs and ottomans take the same styles, so a matching set is the same Style and Upholstery on each.
- Schedules list each piece’s style and finish, such as Chesterfield, leather, oxblood, walnut legs.
Common mistakes
- Changing the size by hand and then the layout: the layout sets its usual size. Choose the layout first, then fine-tune the size.
- A photographed fabric missing from Upholstery: it needs Furniture fabric ticked under where it can go. Edit the finish in My finishes and tick it.
Words in this lesson
- Library
- Real-sized things to place, by category and subcategory: kitchen, bathroom, furniture, lighting, power, heating, stairs, outdoor, site, commercial, vehicles, plants. Search in your own words (GPO, countertop), filter, and star favourites.
- Schedule
- A table drawn from the plan: rooms and finishes, doors, windows, plants or materials. It updates as the plan changes and downloads as CSV.
- My finishes
- Tiles, boards, stone, render, paint and fabric you add from a photo, at their real size and laying, for floors, walls, benchtops and furniture. Keep them in the project, your library or your team’s.
- 3D quality (Standard, High, Ultra)
- How the 3D view is drawn on this device. Standard is fastest; High adds soft reflections, shading where surfaces meet and relief in tiles and timber; Ultra adds finer detail. Auto picks one and steps down if the view slows.
Related lessons
Use your own tiles and finishes from a photoPhotograph a tile, board or sample, give it its real size and laying, and put it on a floor, a wall band or a benchtop.6 minChoose finishes and add fit-out to a roomSet a room’s floor tile and paint, and place a fitting such as a towel rail against a wall to the millimetre.5 minWalk through your plan in 3DTurn the plan into a 3D model, walk through it at eye height, tour the rooms, compare design options and save a picture.4 min
Steps checked in the app on 18 October 2026.