
Learn · Designers and builders · Lesson 11 of 19
Print quality renders in the cloud
You willRender a view on a cloud graphics card, clean enough to print, see the credits it uses first, and get an email when it is done.
Time4 min
Why it mattersA cloud graphics card renders a view in a few minutes that could take an hour on a laptop, and it carries on with Plotlay closed.
You needA Plotlay account. Project pass, Pro and Team include credits each month; a free account has 3 renders to try.
Try it in Plotlay → Opens an example project with this lesson beside it. Nothing to install.
Steps
- Open 3D, stand where you want the picture (or go to a saved view), then open Export and choose Photo render. Or press Ctrl + K and type Cloud renders.
- Under Print quality in the cloud (paid add-on), pick a size (Full HD, 4K, A3 at 150 or 300 dpi) and a quality, Standard or High. The line beside it says how many credits it uses and how many you have left, or on a free account how many you have to try.
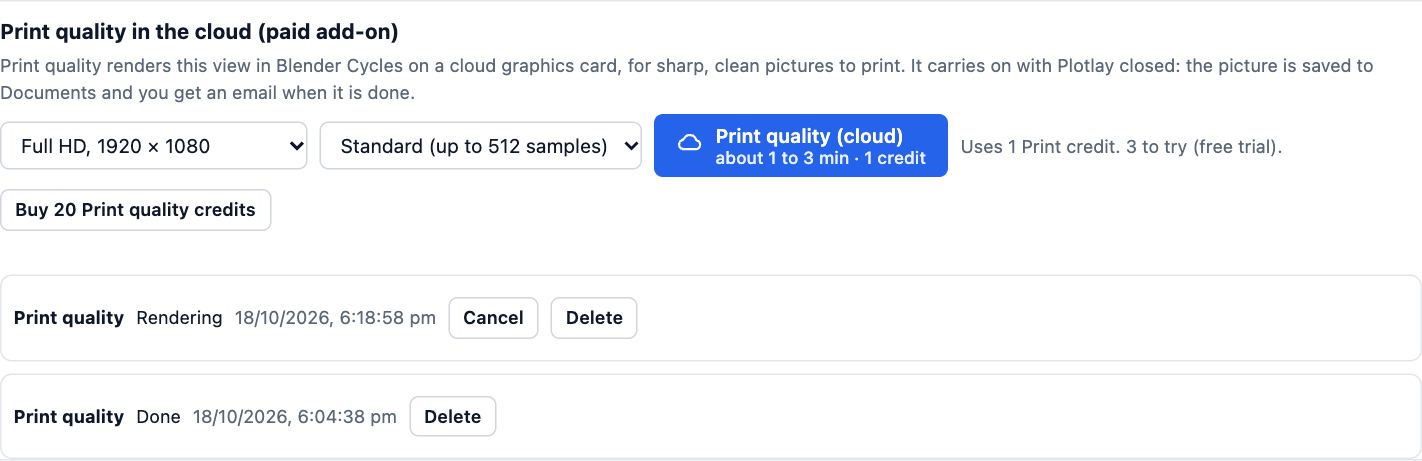
- Choose Print quality (cloud). Plotlay prepares the scene with its finishes, sun and sky and sends it to a cloud graphics card, which renders it in Blender Cycles: about 1 to 3 minutes for Full HD at Standard.
- Carry on working, or close Plotlay: the render runs in the background in the cloud. The jobs list under the button, and Renders (Ctrl + K, then Renders), show how it is going.
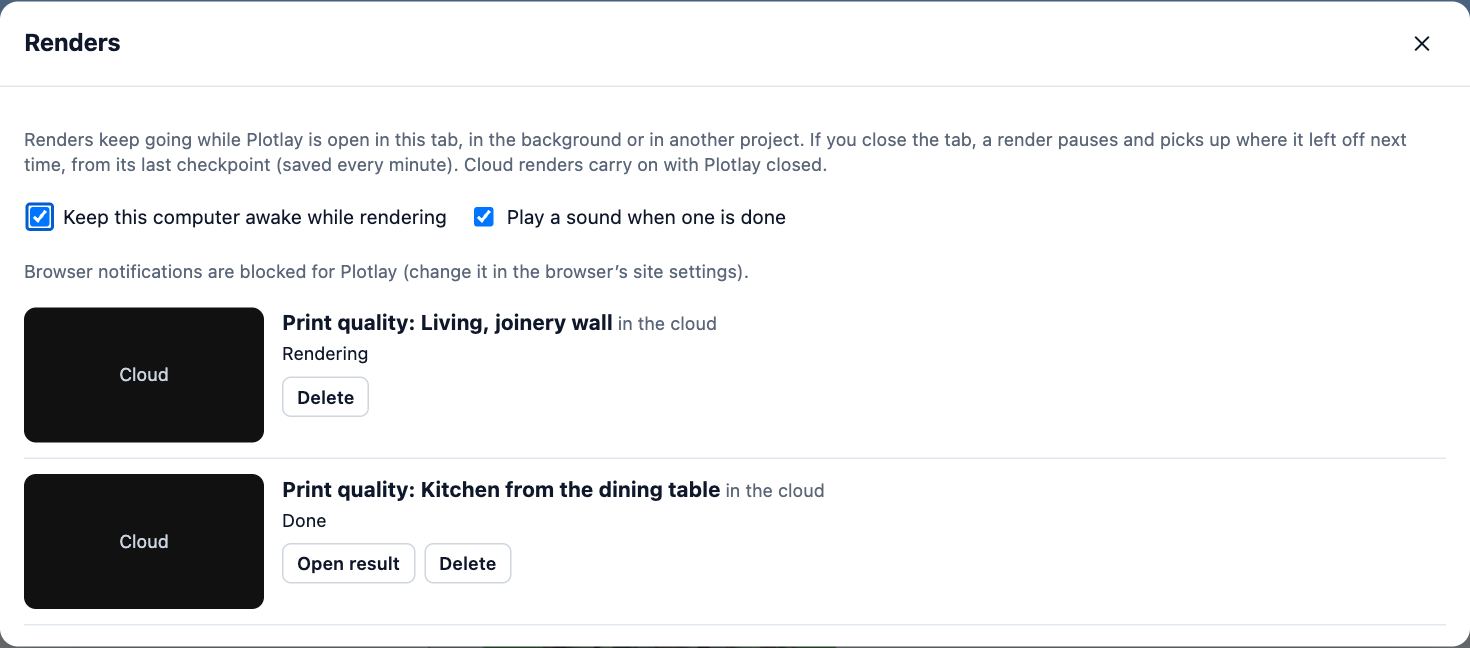
- When it is done you get an email and the picture goes into Documents. If Plotlay was closed, open the project and choose Open result in Renders; for a cloud project, the link in the email does it for you.
Tips
- One credit is a Full HD render at Standard. 4K, A3 and High use 2 to 8: the line beside the button always says how many before you start.
- Credits each month: Project pass 10, Pro 25, Team 75 shared by the team. Unused monthly credits don’t carry over. Buy 20 Print quality credits adds a top-up pack whose credits never expire.
- Credits are taken when a render starts and given back if it fails or you cancel it.
- When a Photo render on your own device would take over 10 minutes, Send to the cloud appears at the top of the dialog: the same view as a Print quality render.
- For a room pack, tick Print quality (cloud) for the render sheets. The credits for every sheet are shown before it starts.
- The cloud scene keeps everything up to about 30 m beyond what the middle of the view looks at; the rest of a large site is left out to keep the upload small.
Common mistakes
- Rendering 4K High for a quick look: try Full HD Standard first, it uses one credit.
- Looking for the button after a free account’s 3 tries are used: Print quality comes with Project pass, Pro and Team, or buy a top-up pack.
- Expecting a closed tab to stop the render: it carries on in the cloud. Choose Cancel in the jobs list to stop it and get the credits back.
Words in this lesson
- Room pack
- A PDF about chosen rooms: each plan at scale, every wall, views inside and the finish and fit-out schedules. Can show before and after side by side.
- Saved view
- A place to look from, kept with the project: the plan, a 3D camera or a spot to stand in walk mode, with the design options, layers, phase and level shown. Saved views play as a tour and can be where a share starts.
Related lessons
Make a photo render of a roomTrace the light in a 3D view to get a photo-like still: daylight through the windows, real glass and metals, soft shadows.5 minShow options and the before rooms in a room packMake a room pack that shows the rooms before and after, side by side, with each design option and a comparison.4 minSave views and play them as a tourSave the places to look from (plan, 3D or walking, with design options), play them as a tour, and share a link that opens at one.4 min
Steps checked in the app on 18 October 2026.