
Learn · Councils and development applications · Lesson 2 of 5
Record the site and its boundary
You willEnter the address, zone, overlays, street boundary and survey facts the application is assessed on.
Time3 min
Try it in Plotlay → Opens an example project with this lesson beside it. Nothing to install.
Steps
- Choose Site, then Site details.
- Type the Property address. It also goes in the title block of every sheet.
- Choose the Zone and tick the Overlays that apply, from the council’s planning map (in South Australia, the SA Property and Planning Atlas).
- Under Street boundary (frontage), pick the boundary edge that faces the street. Each edge shows its length and the way it faces.
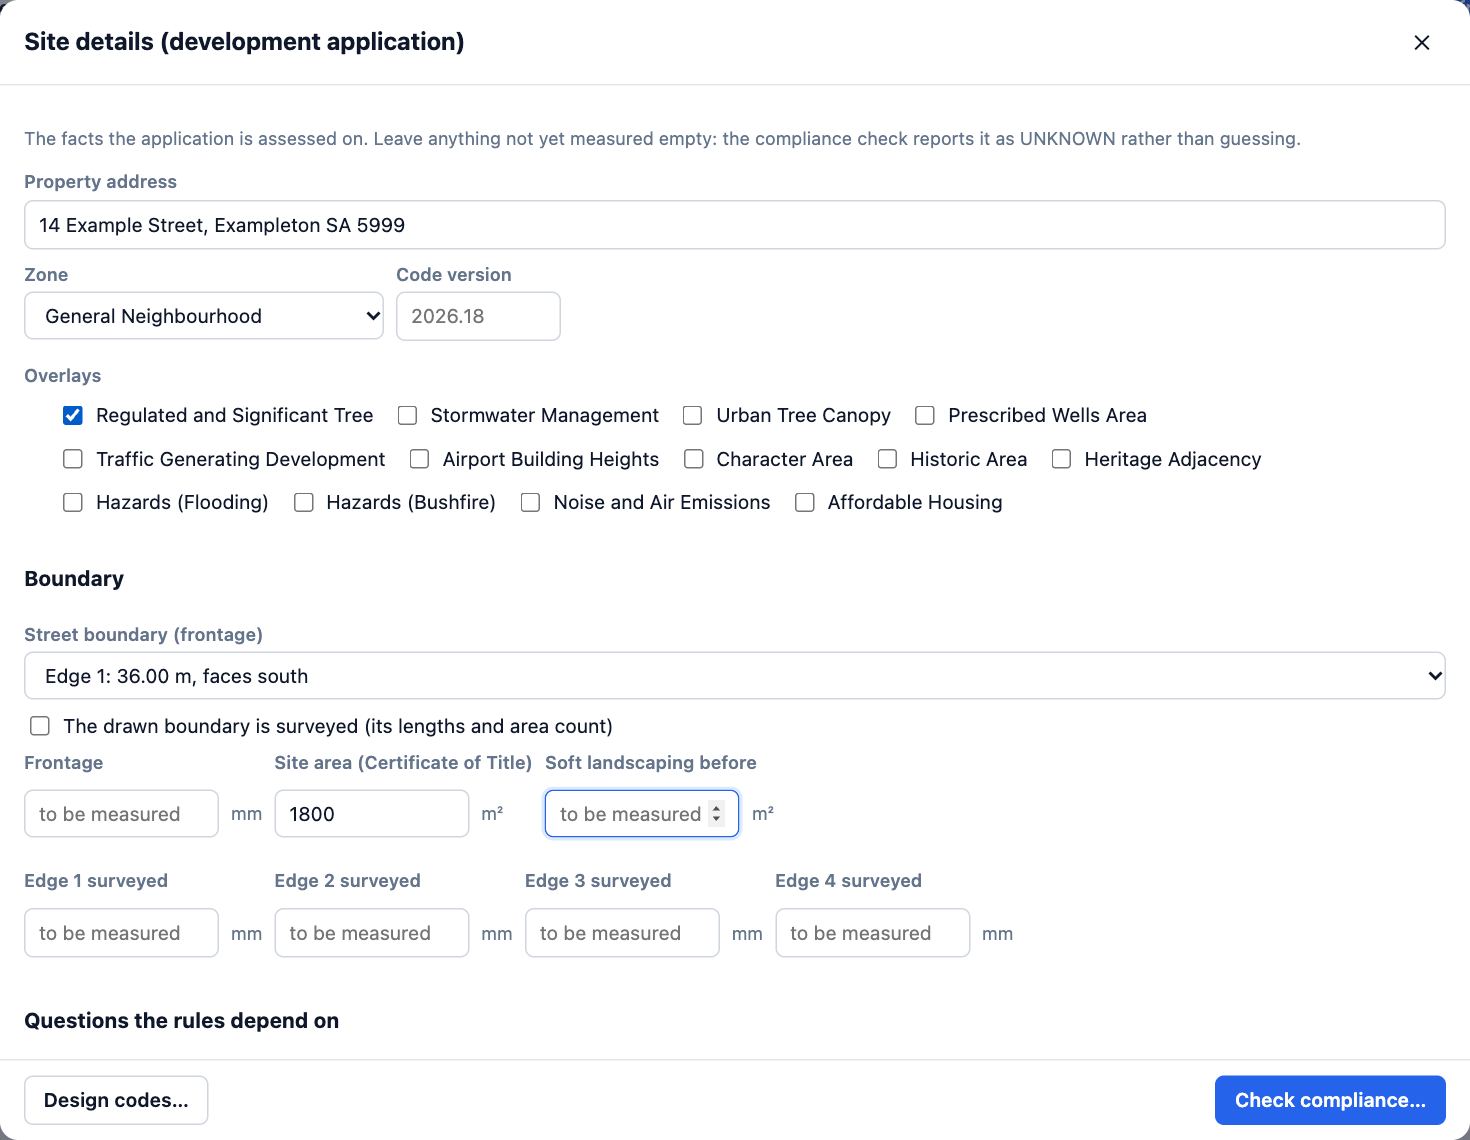
- Fill in the facts you have from the title and survey, such as Site area (Certificate of Title). Leave the rest empty: the check then says UNKNOWN instead of guessing.
- Changes are saved as you go. Choose Check compliance… to see where the design stands.
Tips
- No boundary yet? In a map project, choose the Map tab and Suggest site boundary, or draw it and mark it as the site boundary.
- Tick The drawn boundary is surveyed only when it comes from a surveyor; until then its lengths and area are treated as approximate.
Common mistakes
- Choosing the wrong street edge: setbacks, the building line and the driveway rules all hang off it.
- Typing a guess for a figure nobody has measured. Leave it empty so it shows up as UNKNOWN.
Related lessons
Dimension the setbacksAdd a dimension from the house to each side of the site boundary, and read the distances.2 minRun the compliance checkSee which planning rules the design passes, fails or can’t yet tell, and make the summary to lodge.4 minPin a plan or drawing to the mapLine a site plan, floor plan or PDF up on the aerial by matching two or three points.5 min
Steps checked in the app on 14 October 2026.